In my last post I wrote about how to modify existing dynamic PDF stamps in Adobe Acrobat. This time, I’d like to demonstrate how a “normal” PDF file containing different stamp images can be converted to a PDF stamp file without having to go through the process of using Acrobat’s stamp creation tools.
Let’s assume we have five Adobe Illustrator files that we’ve saved as PDF files. In order to convert these individual files into one PDF file, we use Acrobat’s “Combine Files” feature. If the source files are of a different file format (e.g. PNG or JPEG), this process will work as well.
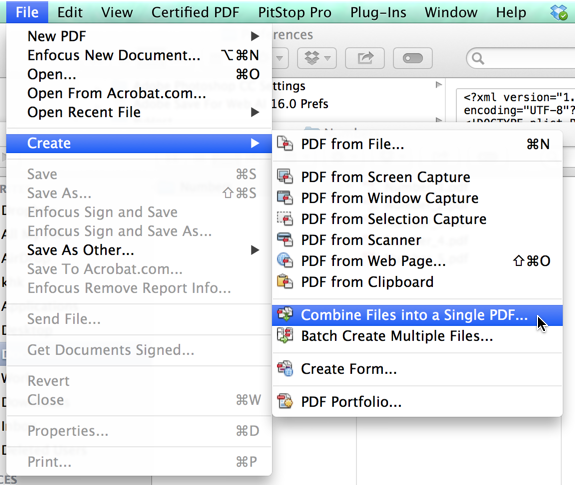
We select “File>Create>Combine File into a Single PDF…” from Acrobat’s menu. On the new dialog that opens, we click on the button in the upper left corner and select “Add Folder…” because all of our files are stored in a single folder (we could also opt for Add Files, and then add files from different locations to our document).
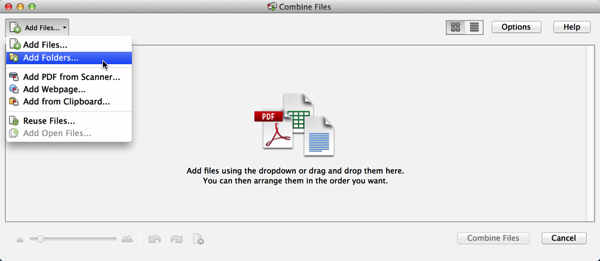
After all files/folders are selected, we can bring the files into the correct order in which we want them to appear in the final PDF document – or our final PDF stamp file.
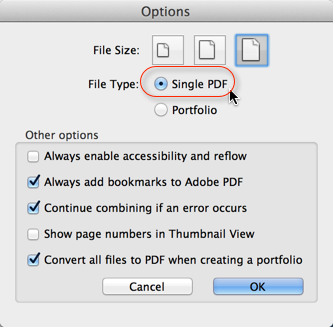
Make sure to click on the “Options” button and verify that “Single PDF” is selected. The other option that is possible is “Portfolio”, which does not work for stamp files.
Combine the files and save the result under a meaningful name (the default is Binder1.pdf). Now we are ready to make the modifications necessary to convert this PDF file into a PDF stamp file.
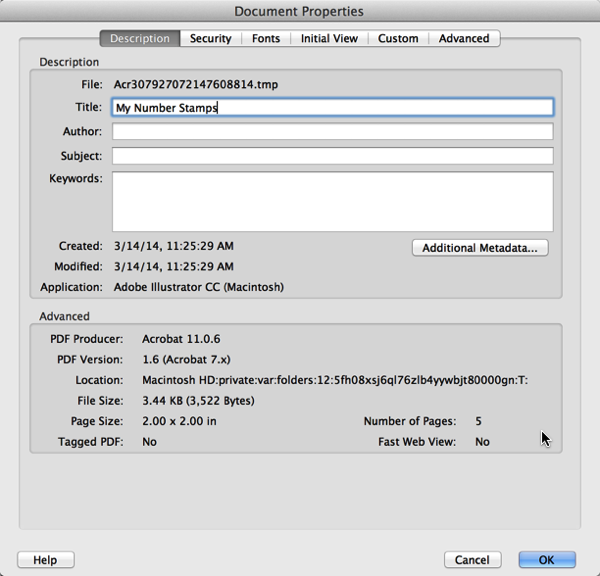
The first thing we need to do with the combined document is to specify the stamp category that all stamps in this file will appear in when the stamp function is selected. When you activate the stamp tool, you will see different categories (e.g. “Dynamic”, “Standard Business”, or “Sign Here”), all of the stamps from one file will be part of the same category. We can specify that category by applying a document title in the document properties dialog. To bring up this dialog, use either Ctrl-D, Cmd-D or File>Properties. Then go to the “Description” tab and specify a document title. The title will be used as the stamp category.
Now that we have a category, we need to add the individual pages as named stamps to this category. Every stamp needs to be defined as a page template – this will provide the name for the stamp.
Page templates are usually used in PDF forms, and allow the user to create – or spawn – multiple copies of “page templates”. For a stamp file, Adobe decided to use the page template feature to identify a stamp in a PDF file.
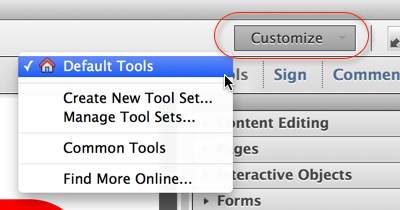
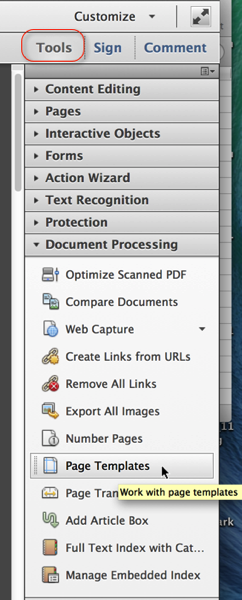
You can find the page template functionality under the “Document Processing” heading in Tools. If you don’t see Tools on the right side of the Acrobat user interface next to Comment and Sign, it is possible that you a are not displaying the default tools, so click on the Customize button and switch to the Default Tools.
Make sure that the first page of the document is displayed in Acrobat, then expand “Document Processing” and click on “Page Templates”.
This will bring up a new dialog, in which you can convert the current page to a page template.
The name of the page template needs to follow a certain pattern in order to make the name show up correctly under the stamp category. It needs to be in the form of
#InternalStampName=Stamp Display Name
The internal stamp name needs to be unique on your system. To name the page template, just type e.g. the following into the name field:
#Stamp_MyStampNumber1=Number 1
Then click on the “Add” button. Acrobat will verify that you want to convert the current page to a page template.
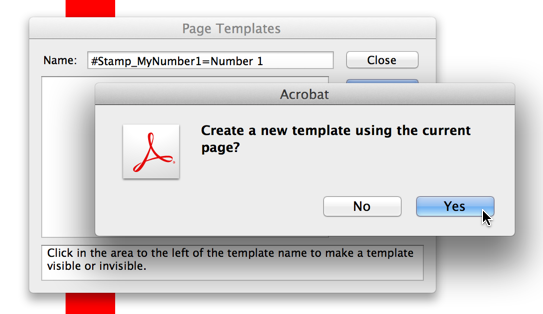
Unfortunately, you have to close the dialog now in order to move to the second page – we cannot define all page templates in one step. Select the next page in the document, bring up the template dialog again and assign a name. Continue to do this for all pages in your document that you want to convert to stamps.
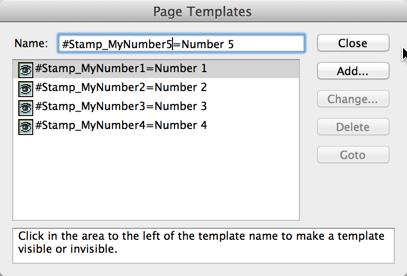
Once you are done with this, save the document and move the new stamp file to Acrobat’s stamp directory. Where that is depends on the operating system, on if you want to install the stamp for every user on the system, and on the version of Acrobat you have.
For Acrobat XI Pro on a Mac, you can install the stamp file for just yourself by saving it to the following directory relative to your home directory:
~/Library/Application Support/Adobe/Acrobat/11.0/Stamps
The corresponding directory for a 64bit Windows 7 installation would be
C:\Users\\AppData\Roaming\Adobe\Acrobat\11.0\Stamps
Once the file is installed, and Acrobat is restarted, you should be able to see the new stamps in the stamp hierarchy:
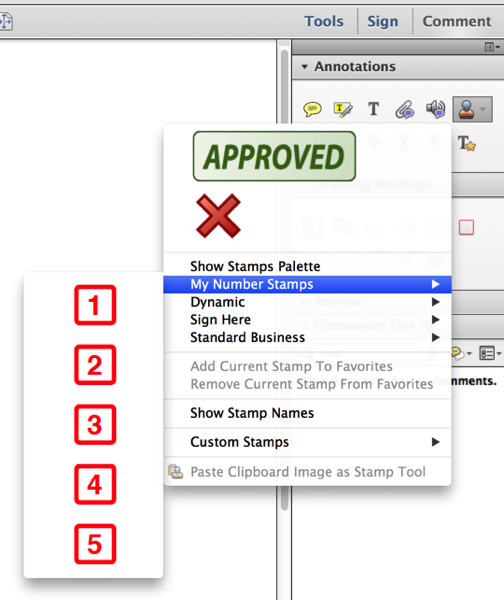
If you have a lot of stamps you need to create, it will be much faster to create a simple JavaScript that will convert all pages in your document to page templates using the Doc.createTemplate() function (see http://livedocs.adobe.com/acrobat_sdk/11/Acrobat11_HTMLHelp/JS_API_AcroJS.89.457.html for more information). If you need help with creating such a script, feel free to get in touch with me to use my consulting services.


wow, thank you so much. clear and great instructions for even non techy person like me can follow=)