Adobe Acrobat has had an interesting feature since at least Acrobat 8: A “Security Envelope” allows the user to pack any document into such an “envelope” and encrypt the contents. Only the recipient with the correct “key” can decrypt these files. This is not limited to just PDF files, you can add Word, Excel, InDesign, and other files as well.
Take a look at this old tutorial from Adobe’s AcroLaw blog for more information about how to do that:
http://blogs.adobe.com/acrolaw/2007/04/safely_send_groups_of_files_usin/
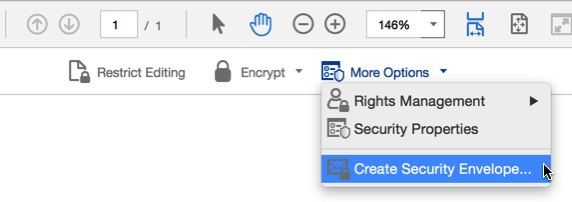
In Acrobat XI and DC, you can find this feature under Tools>Protection>More Options>Create Security Envelope (for Acrobat XI, replace “More Options” with “More Protection”):

The way this function works is as follows: You first select the files you want to “stuff” into your envelope, then you select what envelope template you want to use, and then you select the security settings you want to apply.
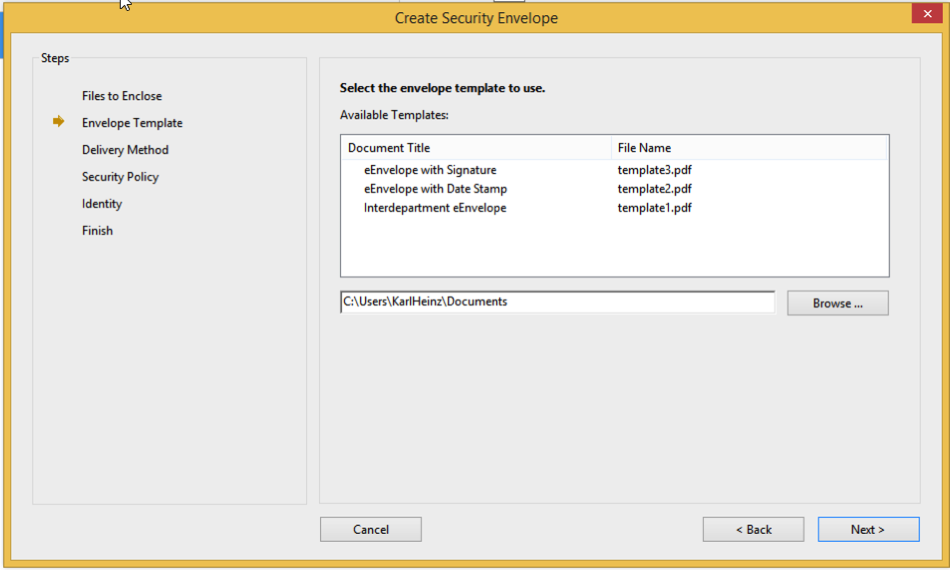
When you run this in the Windows version of Acrobat, you see this dialog when you are supposed to select the security envelope template:

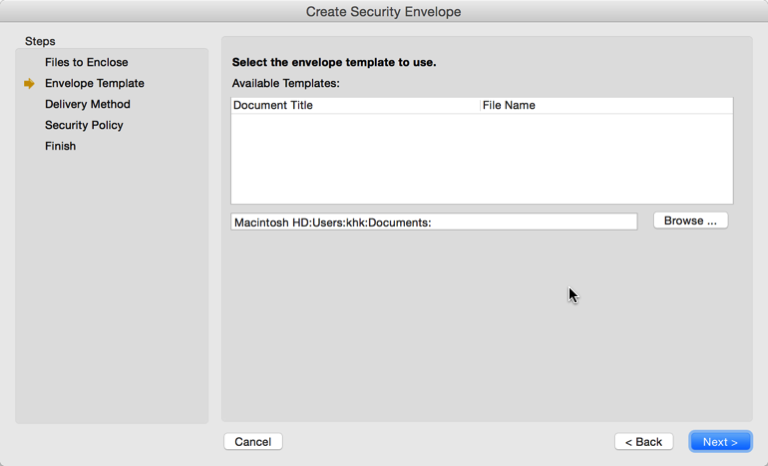
As you can see, there are three default templates listed. On a Mac, these templates are missing:

This is not a new bug in Acrobat DC, these three default templates have been missing for a long time. All we can do is to browse the filesystem and point this dialog to a security envelope template that’s installed somewhere.
These missing templates are actually installed, but Acrobat does not list them. Once you know what template name to search for (e.g. because you poked around the Windows version of Acrobat), it’s not too complicated to find them. They are stored in this folder (for the English version, other localized versions have their own directory parallel to en.lproj:
/Applications/Adobe Acrobat DC/Adobe Acrobat.app/Contents/Resources/en.lproj/DocTemplates
We have two options if we want to use them:
- We can click on the “Browse” button and then navigate to this location in Acrobat’s application bundle. Because the files are stored in the application bundle, we need a second Finder window in which we display this folder, and then drag&drop the file we want to use into the “Envelope Templates” open dialog.
- Or, we can copy these template files to a directory in e.g. the user’s “Documents” folder, then click on the “Browse” button and navigate to that directory. That’s a bit more straight forward, because we only have to navigate into the application bundle once in order to copy the files to our desired target directory.
Because option #2 is so much easier to use, the following will discuss how to set up such a copy of the templates folder.
Open up a Finder window and navigate to e.g. the “Documents” folder and select to create a new folder (e.g. via File>New Folder). Rename this folder so that it uses a meaningful name (e.g. “Acrobat Security Envelopes”).
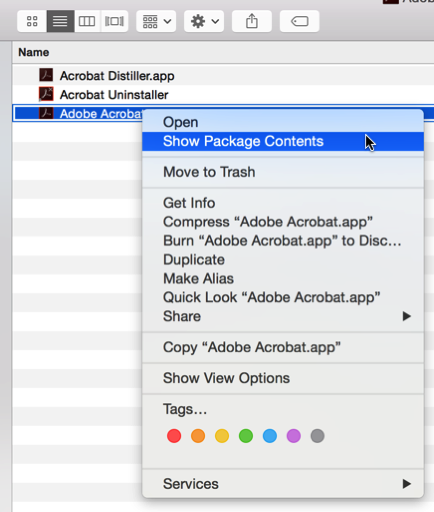
Now open a second Finder window and navigate to your Acrobat application directory (e.g. /Applications/Adobe Acrobat DC/). Here you will find a number of application bundles, one of them being “Adobe Acrobat.app”. Right click on that bundle and select “Show Package Content” from the menu:

Now you can navigate to “/Applications/Adobe Acrobat DC/Adobe Acrobat.app/Contents/Resources/en.lproj/DocTemplates” and select the three templates and copy them to your newly created directory.
From now on, all you need to do when you want to apply a Security Envelope Template is to click on the “Browse” button and then navigate to e.g. “Documents/Acrobat Security Envelopes”.
Another tutorial on Adobe’s AcroLaw blog also demonstrates how you can create your own templates: http://blogs.adobe.com/acrolaw/2007/04/custom_security_envelopes/


